Joe and Mary
Ann McDonald's
Wildlife Photography
September 2004
Question of the Month
How can you capture
an 'angel hair' effect with water, and still have sharp foregrounds
-- leaves or flowers -- on a windy day?
 As
you probably know, 'angel hair' water is that cotton-candy look
where rapids and rills blur into a soft white effect when slow
shutter speeds are used. Sometimes very slow shutter speeds are
effective simply in blurring color, making water patterns that
are soft and pleasing. Foreground elements often show up sharper
when framed by 'soft' water, and I've used this technique to isolate
ice patterns against rapids and autumn leaves and other foliage
against waterfalls and streams.
As
you probably know, 'angel hair' water is that cotton-candy look
where rapids and rills blur into a soft white effect when slow
shutter speeds are used. Sometimes very slow shutter speeds are
effective simply in blurring color, making water patterns that
are soft and pleasing. Foreground elements often show up sharper
when framed by 'soft' water, and I've used this technique to isolate
ice patterns against rapids and autumn leaves and other foliage
against waterfalls and streams.
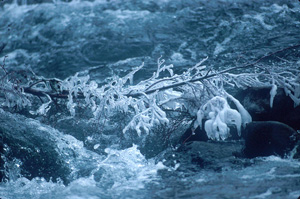
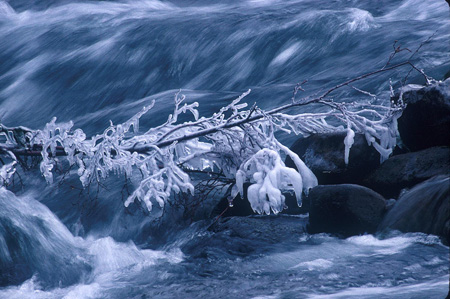
With a fast shutter speed
the branches merge with the rapids in the background. But with
a slow (below), the blurred water no longer competes, visually,
with the ice-covered branch and the branch stands out nicely.
This was done with film, and the images scanned.
Unfortunately, the slow shutter speeds
required to obtain water blurs and 'angel hair' effects won't
freeze a leave or branch or flower swaying in a breeze. I'm always
bothered when I have a great landscape or a water scene that has
a foreground blurred by wind. Now, there is a solution.
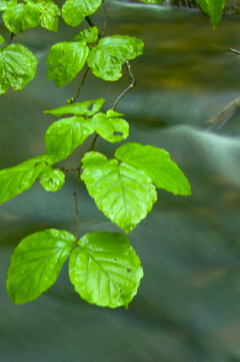
In this enlarged view
you can see the problem -- I have a nice, soft background but
the leaves are soft. There was the slightest breeze, and the branches
swayed just enough so that the resulting digital image was soft.
The solution to this is simple. I shoot
two images. One is done at a very slow shutter speed so that the
desired water effect is obtained. I don't worry about any motion
or blur in the foreground caused by the wind. That will be taken
care of with the second image.
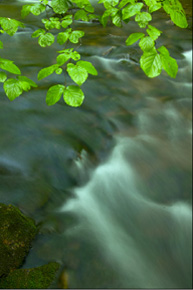
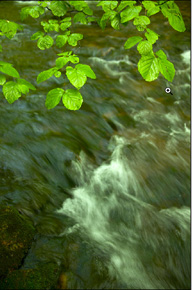
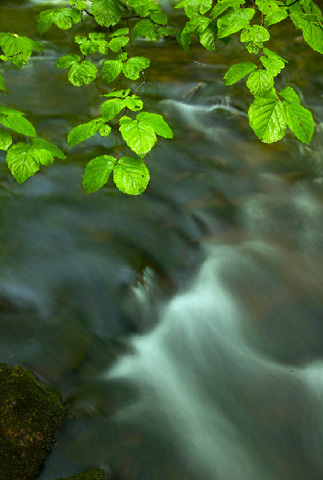
Below, on the Left is the 'look' I was
after, but the leaves are soft (as the enlargement showed). The
image on the right is razor sharp, but the faster shutter speed
used also changed the look to the water that I wanted to achieve.
Now, you might like that look -- it more closely approximates
what are eyes see in real time, because we can't see 'slow' (well,
most of us can't) but we can envision 'slow' and we can choose
a shutter speed that will then render the effect.
Now, in the second shot I keep the exact
same composition and FOCUS, and I simply change the aperture/shutter
speed so that I have a sufficient shutter speed to freeze the
foreground elements. It's very important to keep the focus the
same; otherwise, if you change focus, the actual size (in the
frame) of the foreground and background elements will change.
 I'm
shooting this digitally, but you could do the same technique with
film, provided that you scanned the images, because the next step
is to combine the two images in Photoshop. I open both images,
and then holding the SHIFT key, I drag the sharp foreground image
over and onto the 'angel hair' water shot that has the blurred
foreground. Holding the Shift key maintains a perfect registration
for both images.
I'm
shooting this digitally, but you could do the same technique with
film, provided that you scanned the images, because the next step
is to combine the two images in Photoshop. I open both images,
and then holding the SHIFT key, I drag the sharp foreground image
over and onto the 'angel hair' water shot that has the blurred
foreground. Holding the Shift key maintains a perfect registration
for both images.
In my Layers Palette I have two layers,
with the bottom layer (the background layer) with the 'angel hair'
and the second layer with the sharp foreground. On this second
layer I add a layer mask, and painting with black to hide or mask
out everything but the sharply focused foreground elements, I
mask the image. The result -- the foreground is sharp, and the
background is soft, a result of the slow shutter speed used for
that image.
Of course, a background doesn't have
to be soft or blurred -- it can be razor sharp, too, if the elements
are static. The technique would work just as well if you find
yourself in a situation where great depth of field is required
but the resulting shutter speed doesn't freeze foreground elements.
Understanding masks is so important for
effective work in Photoshop. My composites have become very easy
since incorporating this Photoshop technique, and I'd encourage
everyone to put in the effort to master masks. This concept is
stressed in both our Photoshop
1 and Photoshop
2 courses.
Previous Questions
of the Month
KEY:
|
Exposure |
DIGITAL |
Camera Techniques |
Flash-Remotes |
In the Field |
NANPA |
Contact us by e-mail: hoothollow@acsworld.com
Or FAX us at: (717) 543-6423.