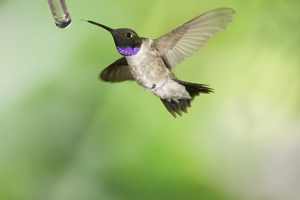
For the last two years we've been maximizing the potential of our hummingbird photography shoots by incorporating the power of Photoshop. When we conducted this shoot for film shooters, we had to disguise the hummingbird feeders' tubes by a flower, which often compromised the pose or the lighting. Since the flower had to be placed between the photographer's position and the feeding tube, it was difficult, and often impossible, to photograph a hummingbird that flew in to the feeder from behind the feeding tube. Most shots required the birds to be flying in from the side, presenting a side-view that did not display the irridescent gorget that makes a hummingbird so stunning.
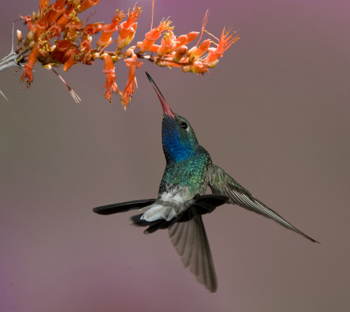
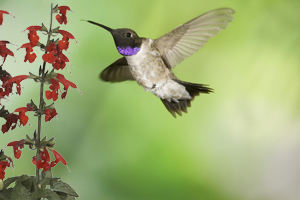
With digital, we've changed our shooting, and now clone out the tube and add a flower digitally. Ethically we see no problem doing this, since the flowers that we used to incorporate into our images were not there naturally, but instead were placed and positioned by the feeder. The flower issue is really a simple one - do we place the flower into this artificial scene before we take the image (and compromise the composition) or after (and enjoy a greater freedom in composing)? We decided after makes more sense, and our images certainly show this new philosophy.
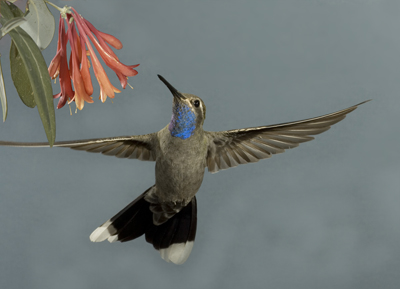
This change in hummingbird technique has resulted in the most exciting images we've ever made of hummingbirds, as poses and flight displays are no longer a problem. Now, capturing the gorget is fairly easy, and dynamic poses are the standard, rather than the exception.
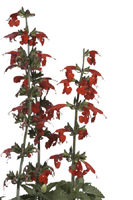
In all of our hummingbird shoots we supply our participants with a collection of extracted flowers that students can add to their images afterwards. We also do a lengthy demonstration on how to extract a flower, and how to add it to an image in a realistic fashion. To do so may require resizing the flower, flipping the flower, and blurring the flower. This may require changing an image's bit mode, image size, and sharpness, as well as using tools like Image>Transform>Scale or Rotate or Flip, and sharpening filters.
In this special two day workshop you will learn how to do these techniques effectively! You'll learn how to use the Transform Command, how to access sharpness or blur to create a sense of depth of field, and effective placement of these additions. You'll learn how to extract flowers or other subjects yourself using various selection tools, and methods to fine-tune those selections to make a perfect extraction. You'll also learn all about MASKS, how to use them, and how they can make your workflow and Photoshop work so much easier.
Additionally, you'll do this in real time with images that you produce yourself at our fabulous high speed flash setups! Our two days will be devoted to a fairly equal amount of time in shooting and in classroom, where you'll photograph hummingbirds and then apply the techniques you're using to these images. By the end of the two days you'll be skilled in these techniques, and you'll be able to produce hummingbird images like you've never done before.
We're very excited about this Hummingbird/Photoshop Workshop, as this will give us the opportunity to really teach a technique that is so exciting and powerful. The Workshop would be perfect for everyone who is doing our normal hummingbird photography shoots, preceding or following this workshop, as well as for those with less time, but with hummingbird photography opportunities of their own, who wish to learn these skills.
 Location:
Santa Rita Lodge, Madera Canyon, about 30 miles south of Tucson
Location:
Santa Rita Lodge, Madera Canyon, about 30 miles south of Tucson
Dates: May 5-8, 2008. Participants arrive on the 5th, with
our first session beginning at 5PM. Participants depart anytime
on May 8th.
Limit: 10 Participants.
What's Included: Rotations through our hummingbird sets,
instruction, lodging, lunches on the 6th and 7th, and a cookout
dinner on the 7th.
What's not included: Transportation during the seminar,
breakfastes, dinner on the 6th.
What You Will Need: A Digital SLR with interchangable lenses, and either a mid-size telephoto lens or a zoom in the range of 70-200, 70-300, 80-400, or 100-400.
You'll also need your LAPTOP computer
loaded with either Photoshop CS2 or CS3, and a RAW conversion
program for converting your images. The RAW conversion program
on CS2 or CS3 should work, provided you have not purchased a camera
model introduced after you purchased Photoshop. In that case,
you will have to download the new RAW converter for that camera.
What we'll cover: You'll learn digital workflow for making
order of your digital files, and the Photoshop techniques to master
effective composites. We will not be covering Bridge, RAW conversion,
or other topics you can learn at our Digital Nature Photography
Courses or our Photoshop courses. You will learn extraction techniques,
Masking, Sharpening, Blurring, the Spot Healing Brush, Patch Tool,
and Clone Tool, Layers, and Edit Transform techniques. You do
not need to be a Photoshop master, but we're going to skip the
topics that our other courses cover and teach you the tools and
techniques needed for hummingbird photography.
Price: $995, Limited to EIGHT participants.
If you are interested in this special
seminar, contact our office ASAP so that we can notify you as
soon as the price is determined.